Genchaos
Well-known member
Part 1
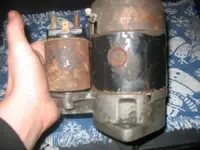
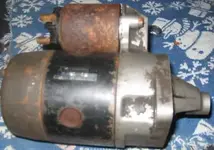
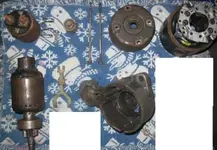
First off this rebuild is for a stock starter from a Samurai 1.3L engine. I?ve taken apart and put these back together many, many times in one day. So for those having troubles here?s how to take it apart and put it back together. This is a starter I have kept to do this article and does not work due to the gear.

Tools required: 8mm socket with socket wrench
Screwdriver

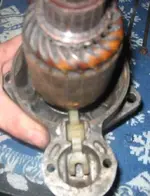
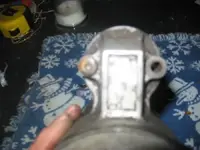
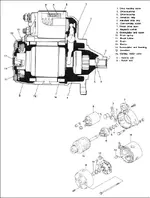
1. Remove the wire from the negative terminal ( put the bolt back on the negative terminal to aid in putting it back together) and remove the 2 screws holding the solinoid to the drive housing. (rubber and metal plate are missing from the pic)

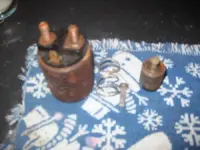
There will be a plunger and a spring inside with 2 screws, a rubber piece and a metal piece.

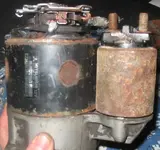
2. Remove 2 small screws and the 4 large hex head bolts.

3.Crack the starter like an egg. A few light taps with a hammer or something equivelant will do it.
The cap will come off and then the drive housing.


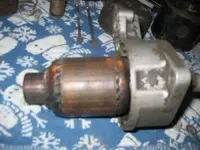
4. Remove the armature from the housing and the Plastic lever
Congratulations you have disasembled a starter

Steve
First off this rebuild is for a stock starter from a Samurai 1.3L engine. I?ve taken apart and put these back together many, many times in one day. So for those having troubles here?s how to take it apart and put it back together. This is a starter I have kept to do this article and does not work due to the gear.
Tools required: 8mm socket with socket wrench
Screwdriver
1. Remove the wire from the negative terminal ( put the bolt back on the negative terminal to aid in putting it back together) and remove the 2 screws holding the solinoid to the drive housing. (rubber and metal plate are missing from the pic)
There will be a plunger and a spring inside with 2 screws, a rubber piece and a metal piece.
2. Remove 2 small screws and the 4 large hex head bolts.
3.Crack the starter like an egg. A few light taps with a hammer or something equivelant will do it.
The cap will come off and then the drive housing.
4. Remove the armature from the housing and the Plastic lever
Congratulations you have disasembled a starter
Steve
Attachments
-
 Starter rebuild 001.webp27.3 KB · Views: 2,212
 -
 Starter rebuild 007.webp36.1 KB · Views: 1,931
 -
 Starter rebuild 006.webp24.2 KB · Views: 1,939
 -
 Starter rebuild 005.webp27.2 KB · Views: 1,958
 -
 Starter rebuild 004.webp21.7 KB · Views: 2,055
 -
 Starter rebuild 002.webp19.2 KB · Views: 2,068
 -
 Starter diagram.webp28.3 KB · Views: 2,239